- 0 replies
- 1,611 views
- Add Reply
- 0 replies
- 1,386 views
- Add Reply
- 0 replies
- 2,393 views
- Add Reply
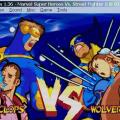
QMC2 0.1.b7 released (not the same as last time)
Mame Front End for Unix
As the attention for QMC2 along with the amount of work for the project is steadily increasing, we think it's time for a new site layout. The old look was a bit too dry and boring... we hope you enjoy the new appearence!
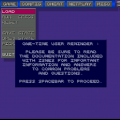
Today we also release QMC2 0.1.b7 (), which contains major improvements to allow for system-wide configuration and installation. This should make maintainers for binary packages happy. You still don't have to install QMC2 in order to run it, but it's recommended.
This version is required to cleanly support SDLMAME 0.111+, which changed the way it reports missing ROMs!
IMPORTANT: the old place for the configuration file (which was $HOME/.config/qmc2.ini) will NO LONGER be used! Its new place is $HOME/.qmc2/qmc2.ini. If you want to reuse your old configuration, you'll have to copy it manually! Otherwise it will be created automatically with a minimal startup configuration.
CHANGES - v0.1.b7, 12-DEC-2006
fix: general bug fixes
imp: improved functionality
new: newly added functionality
doc: documentation changes
inf: informational only
v0.1.b7, 12-DEC-2006:
fix: weird layout problem in setup-wizard (welcome.ui)
imp: updated Qt language file (from Qt 4.2.2)
imp: ROM verification enhancements to support SDLMAME 0.111+ (which changed the way it reports missing ROMs)
new: install target for make
new: many changes to support system-scope (/etc/qmc2/qmc2.ini) and user-sope (~/.qmc2/qmc2.ini) configuration
new: build: SDLMAME support is now the new default (use "make SDLMAME=0" for XMAME support)!
new: icons now embedded into application (see resource file qmc2.qrc)
new: added optional ROM path setting to setup-wizard (welcome.*)
More Mame 0.111 related
MamePlayer 1.5.2 released
Front End
1.5.2- Fixed: Icons not aligning correctly after applying Switch "The".
- Fixed: Icons not aligning correctly when using search filter.
- Added: Delete button to individual game options which deletes
.ini - Moved: Refresh menu item from View to Options.
- Renamed: 'Refresh' menu item to 'Verify ROMs' and removed F5 shortcut.
- Changed: Various other menu items.
- Added: current view to game list counter (statusbar).
Glide64 Wonder ++ released
Video PlugIn
Glide64 Wonder. New updatePublished tuesday 12 december 2006 by gonetz
More then a year is passed since previous official release of Glide64. The project is still alive, but I don’t have much time to work on it. I made some improvements, nice but not revolutionary. It’s just another plus to the famous ‘Wonder’ version. Main results:
* Improvements in hardware frame buffer emulation for Banjo Kazooie, Banjo Tooie, Mickey's Speedway USA
* Added support for highlighted objects in Perfect Dark. Added support for coronas in this game (requires software depth buffer rendering). Both features are very important for correct emulation. Now Glide64 emulates PerfectDark nearly perfect, only sky is still missing. Needless to say, that all frame buffer based effects work too (there are many of them in this game).
* Fixed combiners in several games.
* Hacktarux's glide wrapper was improved too, and its modifications can be named revolutionary. First of all, it now supports hardware frame buffer emulation! This feature was previously available for 3dfx users only, and now owners of Direct9X cards can enjoy it too. My thanks to mudlord, who helped us to solve several problems during testing of this feature. Note: OpenGL implementation of texture frame buffer is not as efficient as Glide3x one, and it requires much more video memory. Thus, at least 128mb Direct9x video card is required for hardware frame buffer emulation. Please run mudlord’s gltest.exe, placed in wrapper’s folder, to check compatibility of your video card with the wrapper. Second, Hacktarux fixed several old problems in the wrapper:
** fixed dithered alpha emulation on ATI cards
** fixed chromakey functions
** fixed Lens of Truth problem in Zelda MM
** added some missing combine modes
* You may also check mudlord’s unofficial builds of the wrapper in this thread. mudlord did some experimental speed improvements, so may be his builds will work for you better than official one.
* And the last thing – "How to install Glide64". This question was asked and answered hundred times already, it’s described in readme.txt, but nevertheless lazy lamers keep asking it again and again. Thus, I wrote this ultimate guide "Glide64 installation for dummies":
** Download Glide64 distributive
** Unpack it into temporal folder
** Go to that temporal folder
** Copy Glide64.dll and Glide64.ini from "Plugin" folder into "Plugin" folder of your emulator
** If you don't have 3dfx card, copy glide3x.dll from "Hacktarux's glide3x wrapper" into your emulator's folder, where main exe file is placed (main exe is Project64.exe or 1964.exe or mupen64.exe etc)
** Run your emulator
** In emulator's settings select Glide64 as your video plugin. Push "About" button to see information about the plugin (optional)
** Now you need to configure video plugin. Select correspondent option in emulator's settings. In Glide64 configuration dialog select desired screen resolution. If you have fast PC, select 'Depth buffer render' option. For Mupen64 emulator, select 'Get frame buffer info' option. If you don't have 3dfx card, push 'Wrapper' button and select full screen resolution for the wrapper. Press "Ok' button to close configuration dialog
Run a game
* If a game does not work well, check 'Glide64 compatibility list.htm' for additional options. If game's status is "Compatible', but it actually does not work - report about it on our forum
* Note: if you are using Project64 emulator with the wrapper, you must close the emulator after each game, otherwise you will get an error message.
* Serious warning: I’ve put a special code into Glide64. If you will ever again ask “How to install Glide64”, this code will be triggered, and then #25 frame will be rendered and command you to kill yourself up against a wall. After that your computer will explode. You been warned!
>> Get it HERE.